Choose the version of Windows Live Messenger you have installed on your computer:
-
Verify that your Logitech webcam is functional
-
Launch the Logitech Webcam Software (LWS):
-
LWS 1.x: Start > Programs > Logitech > Logitech Webcam Software > Logitech Webcam Software
-
LWS 2.x: Start > Programs > Logitech > Logitech Webcam Software
-
-
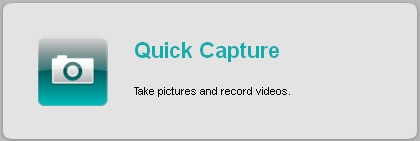
Click the Quick Capture option.
LWS 1.x LWS 2.x 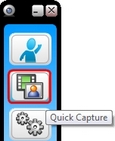
-
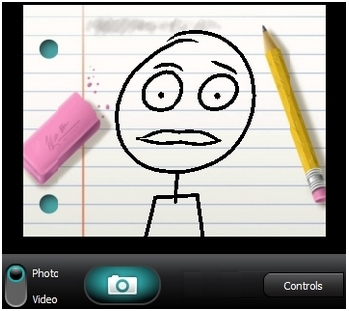
Make sure you can see yourself in the LWS window.
LWS 1.x LWS 2.x 
-
Close the LWS window.
-
-
Verify that your Logitech webcam is selected in the Windows Live Messenger Settings
NOTE: The following screenshots show the QuickCam Pro 9000 as an example. Windows Live Messenger will show your Logitech webcam.
-
Launch Windows Live Messenger (Start > All Programs > Windows Live Messenger).
-
Double-click the name of the person in your contact list that you want to start a video call with.

-
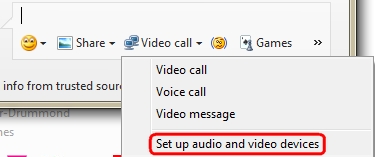
Under "Video call", click the drop-down arrow.

-
Select "Set up audio and video devices".
-
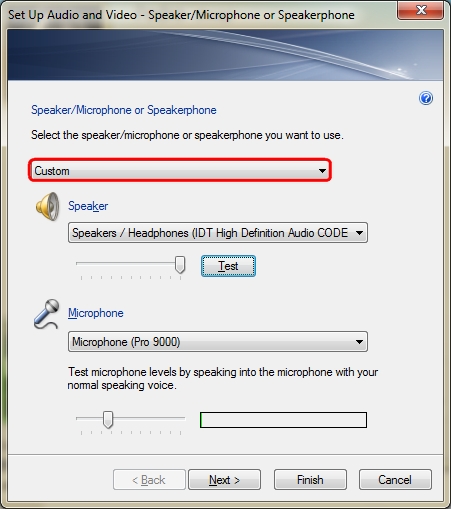
Select the Custom option from the drop-down menu.
-
Select the headphones or speakers you'd like to use under Speaker and then click the Test button to make sure you can hear sound in your speakers.

-
If your Logitech webcam has a built-in microphone, verify that it is selected in the Microphone drop-down menu and then click Next.
NOTE: If your Logitech webcam doesn't have a built-in microphone, you'll need to use an external one to talk to your contacts.
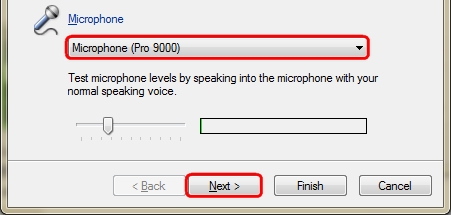
NOTE: The green bar shows your sound volume. To test your volume, speak into the microphone and verify that the green bar moves.
-
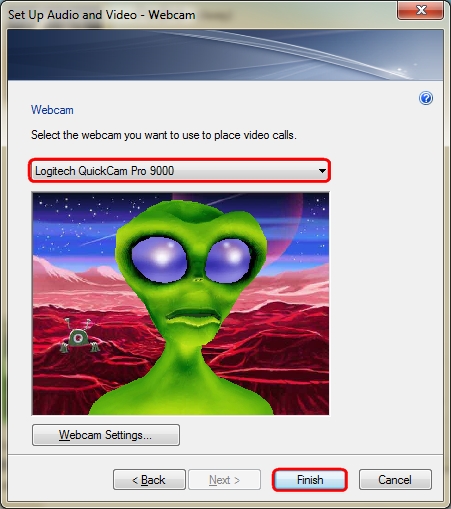
Verify that your Logitech webcam is selected under the Webcam drop-down menu and then click Finish.
-
-
Verify that your Logitech webcam is functional
-
Launch the Logitech Webcam Software (LWS):
-
LWS 1.x: Start > Programs > Logitech > Logitech Webcam Software > Logitech Webcam Software
-
LWS 2.x: Start > Programs > Logitech > Logitech Webcam Software
-
-
Click the Quick Capture option.
LWS 1.x LWS 2.x -
Make sure you can see yourself in the LWS window.
LWS 1.x LWS 2.x -
Close the LWS window.
-
-
Verify that your Logitech webcam is selected in the Windows Live Messenger Settings
NOTE: The following screenshots show the QuickCam Pro 9000 as an example. Windows Live Messenger will show your Logitech webcam.
-
Launch Windows Live Messenger (Start > Programs > Windows Live > Windows Live Messenger).
-
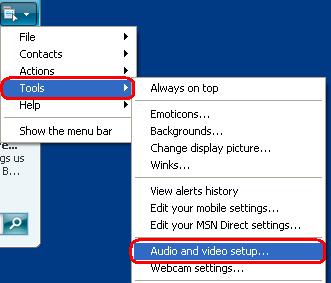
Select "Audio and video setup" from the Tools menu.
-
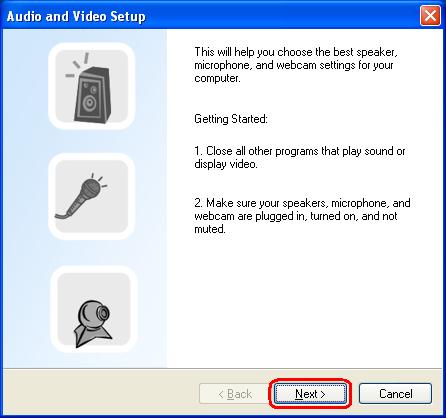
When the wizard starts, click Next.
-
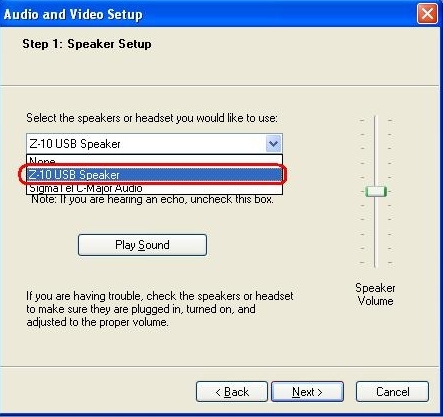
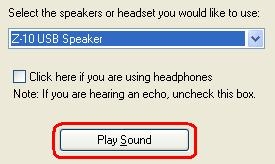
Select the headphones or speakers you'd like to use.
-
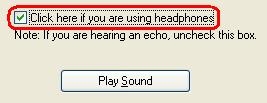
If a speaker is selected, uncheck the box next to "Click here if you are using headphones" by clicking in it.
-
Click the Play Sound button to make sure you can hear sound in your speakers and then click Next.
-
If your Logitech webcam has a built-in microphone, verify that it is selected and then click Next.
NOTE: If your Logitech webcam doesn't have a built-in microphone, you'll need to use an external one to talk to your contacts.
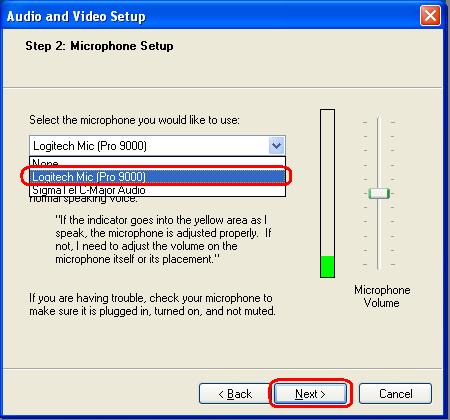
NOTE: The green bar shows your sound volume. To test your volume, speak into the microphone and verify that the green bar moves.
-
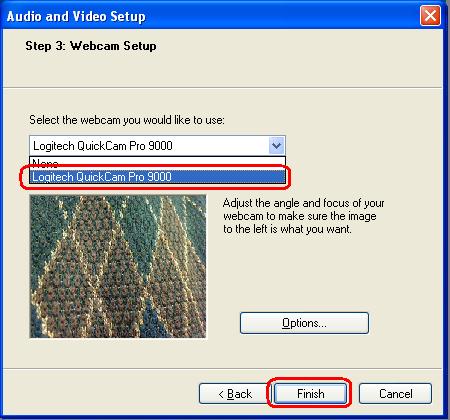
Verify that your Logitech webcam is selected from the Webcam drop-down menu and then click Finish.
-
Additional information
If you still cannot see or hear the other person, it can be due to a variety of possible issues, including:
-
Windows or third-party firewall settings.
-
Your internet service provider (AT&T, Comcast, etc) could be blocking certain services.
-
Missing Windows system components.
For assistance with these problems, visit the Logitech Video Software and Services page for a video tutorial. You can also visit the Help Page for Windows Live Messenger.
Important Notice: The Firmware Update Tool is no longer supported or maintained by Logitech. We highly recommend using Logi Options+ for your supported Logitech devices. We are here to assist you during this transition.
Important Notice: The Logitech Preference Manager is no longer supported or maintained by Logitech. We highly recommend using Logi Options+ for your supported Logitech devices. We are here to assist you during this transition.
Important Notice: The Logitech Control Center is no longer supported or maintained by Logitech. We highly recommend using Logi Options+ for your supported Logitech devices. We are here to assist you during this transition.
Important Notice: The Logitech Connection Utility is no longer supported or maintained by Logitech. We highly recommend using Logi Options+ for your supported Logitech devices. We are here to assist you during this transition.
Important Notice: The Unifying Software is no longer supported or maintained by Logitech. We highly recommend using Logi Options+ for your supported Logitech devices. We are here to assist you during this transition.
Important Notice: The SetPoint software is no longer supported or maintained by Logitech. We highly recommend using Logi Options+ for your supported Logitech devices. We are here to assist you during this transition.
Frequently Asked Questions
There are no products available for this section
There are no Downloads for this Product
There are no Downloads for this Version.
Compatible Product
