We recommend that you first install the Alert Commander Software and prepare your cable run and power/network supply connection. This will allow you to run the setup process and test for proper camera detection before mounting the camera.
The starter (750e) and add-on (700e) kit for the outdoor camera includes a mounting device that enables you to place your outdoor camera on top of a post or hang your camera from a wall, ceiling or overhang.
-
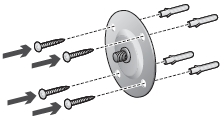
Start by pre-drilling holes into the wall and screwing in the mounting base.
-
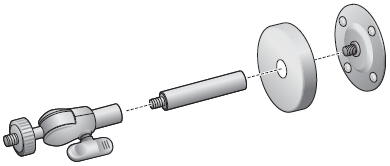
Assemble the mounting arm and attach it to the base.
-
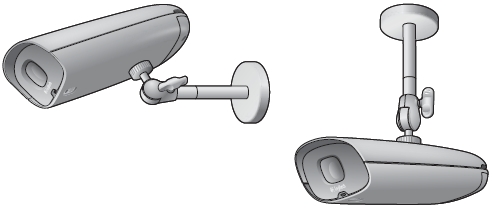
Attach the camera to the mounting arm.
-
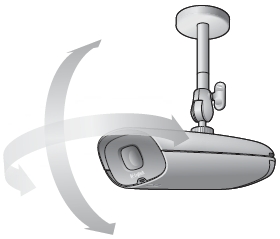
Adjust to the desired viewing area.
-
On the bottom of the camera, turn the screws counterclockwise until you're able to open the door.
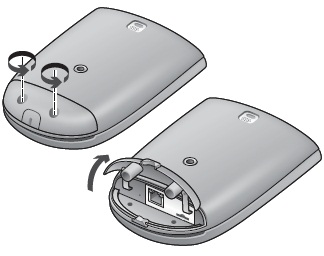
-
Plug the RJ45 cable into the connector.
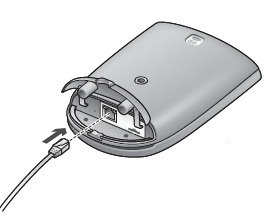
-
Close the door and tighten the screws by turning them clockwise.

NOTE: Tighten screws firmly. If not done properly, water may leak in and damage the camera.
Tip: Mount the outdoor camera under an eave or other overhang so it isn't exposed to direct sunlight.
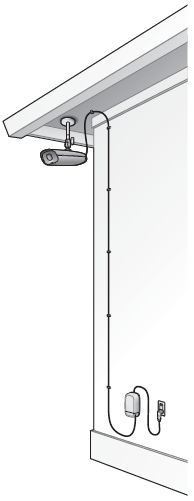
NOTE: For details on mounting the power supply, please see answer 360023229154.
Important Notice: The Firmware Update Tool is no longer supported or maintained by Logitech. We highly recommend using Logi Options+ for your supported Logitech devices. We are here to assist you during this transition.
Important Notice: The Logitech Preference Manager is no longer supported or maintained by Logitech. We highly recommend using Logi Options+ for your supported Logitech devices. We are here to assist you during this transition.
Important Notice: The Logitech Control Center is no longer supported or maintained by Logitech. We highly recommend using Logi Options+ for your supported Logitech devices. We are here to assist you during this transition.
Important Notice: The Logitech Connection Utility is no longer supported or maintained by Logitech. We highly recommend using Logi Options+ for your supported Logitech devices. We are here to assist you during this transition.
Important Notice: The Unifying Software is no longer supported or maintained by Logitech. We highly recommend using Logi Options+ for your supported Logitech devices. We are here to assist you during this transition.
Important Notice: The SetPoint software is no longer supported or maintained by Logitech. We highly recommend using Logi Options+ for your supported Logitech devices. We are here to assist you during this transition.
Frequently Asked Questions
There are no products available for this section
There are no Downloads for this Product
There are no Downloads for this Version
Compatible Product
