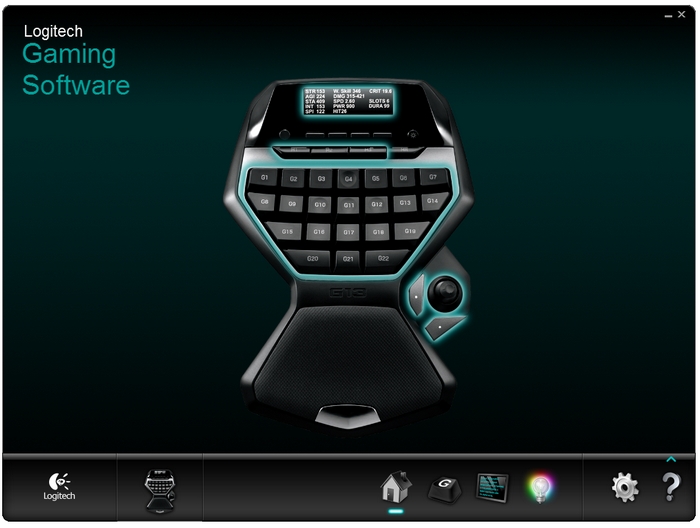
There are three ways to create and assign profiles for a G-Series keyboard:
Logitech Gaming Software comes with preconfigured profiles for many games. The software can automatically detect games installed on your system and recommend profiles for them. These profiles are available for most games that were around before the release of the software. If your game is very new, there may not be a preconfigured profile for it.
To scan your system for games with preconfigured profiles:
-
Launch the Logitech Gaming Software.
Start > Logitech > Logitech Gaming Software 7.x

-
At the bottom of the main screen, click the G-Key icon.

-
Under Profiles, click the down arrow beneath the document icon with the "+" sign and select "Scan for New Games."

The software will now search your computer for recognized games and automatically select those for which it has profiles.

NOTE: If your game is on the list but wasn't automatically selected, you can manually click the check box next to it. You'll need to assign the correct ".exe" afterward to create a profile for it. To do this, follow the instructions in Knowledge Base article 360023235394 under "Making sure the profile is associated with the correct executable."
-
Click OK. The software will automatically create and assign the default profiles.

The preconfigured profiles should now be installed. To further customize your profiles, see Knowledge Base article 360023235394.
-
Launch the Logitech Gaming Software.
Start > Logitech > Logitech Gaming Software 7.x

-
At the bottom of the main screen, click the G-Key icon.

-
Under Profiles, click the down arrow beneath the document icon with the "+" sign and select "Create New Profile."

-
Enter a Name and Description for your new profile in the fields provided.
-
Under Select Game Executable choose an option:
-
Browse. If you already know where the .exe file for your game is located, you can use this option to navigate to and select it.
-
Select using GamePanel display. Choose this option if you have a G-Series keyboard with an LCD display attached or if the Browse option isn't working for you. After you click OK, the LCD display will help you locate the .exe file.
NOTE: When using the Select option, make sure your game is fully loaded by running it up where you would be able to start playing. Then, press the button shown in the LCD display and exit the game to finish the configuration.
-
-
Select the Lock profile while game is running check box if you play with one game running at a time. This keeps the profile locked while it sees the game it is associated with running.
-
Select the Copy from existing profile check box when you're creating a second profile for a game that is similar to one for which you already have a profile. You'll need to specify the new .exe, but any existing key bindings will show up in the new profile.
-
Click OK when you're finished. The new profile will be visible in the Gaming Software window. If the software was able to detect a game's logo icon, it will show in the Profiles area at the top.

If another gamer has shared a profile that you want to use, you can import this profile into your own computer and then associate it with your copy of the game. Here's how:
-
Launch the Logitech Gaming Software.
Start > Logitech > Logitech Gaming Software 7.x

-
At the bottom of the main screen, click the G-Key icon.

-
Under Profiles, click the down arrow beneath the open folder icon and select "Import...".


-
Use the dialog window that pops up to browse to where the .lgp or .xml file you want to import is located and then click Open.
-
If you already have a profile associated with the game you're attempting to import another profile for, the following dialog box may display:

-
Select the option that will best suit your needs.
Additional information
For information on assigning functions to the G-Key, see Knowledge Base article 360023235394.
For help with creating macros, see Knowledge Base article 360023235394.
Important Notice: The Firmware Update Tool is no longer supported or maintained by Logitech. We highly recommend using Logi Options+ for your supported Logitech devices. We are here to assist you during this transition.
Important Notice: The Logitech Preference Manager is no longer supported or maintained by Logitech. We highly recommend using Logi Options+ for your supported Logitech devices. We are here to assist you during this transition.
Important Notice: The Logitech Control Center is no longer supported or maintained by Logitech. We highly recommend using Logi Options+ for your supported Logitech devices. We are here to assist you during this transition.
Important Notice: The Logitech Connection Utility is no longer supported or maintained by Logitech. We highly recommend using Logi Options+ for your supported Logitech devices. We are here to assist you during this transition.
Important Notice: The Unifying Software is no longer supported or maintained by Logitech. We highly recommend using Logi Options+ for your supported Logitech devices. We are here to assist you during this transition.
Important Notice: The SetPoint software is no longer supported or maintained by Logitech. We highly recommend using Logi Options+ for your supported Logitech devices. We are here to assist you during this transition.
Frequently Asked Questions
There are no products available for this section
