You can access the advanced webcam settings after selecting your Logitech webcam as a video source. The options will appear on the control panel beneath the webcam.
PRESET MENU

Click on the drop down to access the presets menu.
The custom option enables you to fully configure your webcam settings.
PRIORITY MENU

When Frame rate is selected, maintaining constant FPS (frames-per-second) is the priority.
When Exposure is selected, maintaining the correct level of light is the priority.
PAN/TILT & ZOOM

You can adjust the PAN/TILT of your webcam lens by clicking the directional arrows.
Drag the ZOOM slider left to zoom-out the composition and right to zoom in.
RESET TO DEFAULT returns the webcam to its original position.
ANTI-FLICKER

The ANTI-FLICKER setting helps reduce flicker when recording under artificial lighting, such as fluorescent lights or light from an LED screen.
You can adjust the anti-flicker rate to either 50hz or 60hz and remove the flickering from your video.
AUTO FOCUS

Auto Focus is set to ON by default. To turn off Auto Focus, click the switch on the right.
Once Auto Focus is turned off, you can drag the slider to adjust the plane of focus.
AUTO WHITE BALANCE

Auto White Balance is set to ON by default. To turn off Auto White Balance, click the switch on the right.
Once Auto White Balance is turned off, you can drag the slider to make the image cooler or warmer.
IMAGE ADJUSTMENTS
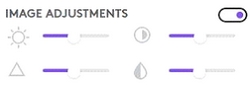
You can calibrate your image settings by dragging the slider next to each symbol:
 |
Brightness |
 |
Contrast |
 |
Sharpness |
 |
Saturation |
CHROMA KEY

You must have a green or blue screen placed behind you for this feature to work.
Turn Chroma Key ON by clicking the switch to the right.
ADVANCED OPTIONS

Check the Mirror Source box to flip your image.
Important Notice: The Firmware Update Tool is no longer supported or maintained by Logitech. We highly recommend using Logi Options+ for your supported Logitech devices. We are here to assist you during this transition.
Important Notice: The Logitech Preference Manager is no longer supported or maintained by Logitech. We highly recommend using Logi Options+ for your supported Logitech devices. We are here to assist you during this transition.
Important Notice: The Logitech Control Center is no longer supported or maintained by Logitech. We highly recommend using Logi Options+ for your supported Logitech devices. We are here to assist you during this transition.
Important Notice: The Logitech Connection Utility is no longer supported or maintained by Logitech. We highly recommend using Logi Options+ for your supported Logitech devices. We are here to assist you during this transition.
Important Notice: The Unifying Software is no longer supported or maintained by Logitech. We highly recommend using Logi Options+ for your supported Logitech devices. We are here to assist you during this transition.
Important Notice: The SetPoint software is no longer supported or maintained by Logitech. We highly recommend using Logi Options+ for your supported Logitech devices. We are here to assist you during this transition.
Frequently Asked Questions
There are no products available for this section
There are no Downloads for this Product
There are no Downloads for this Version
Compatible Product
