Verify your Logitech webcam is functional:
-
Launch the following:
- QuickCam software (Start > Programs > Logitech > Logitech QuickCam)
- Logitech Webcam Software or LWS (Start > Programs > Logitech > Logitech Webcam Software > Logitech Webcam Software)
-
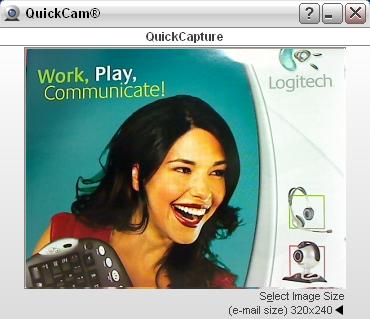
Verify that you can see yourself in the webcam software window as shown below:


-
Close the webcam software window.
Verify that your Logitech webcam is selected in the Windows Live Messenger Settings:
NOTE: The following screenshots use the QuickCam Communicate STX as an example. Aside from specifying your Logitech webcam, the screens are otherwise as shown below.
-
Launch Windows Live Messenger (Start > Programs > Windows Live > Messenger)
-
Select Audio and Video Setup from the Tools menu as shown below:

-
The wizard will start. Click Next:

-
Select the headphones or speakers you would like to use as shown below:

-
Check the "Click here if you are using headphones" checkbox as shown below:

-
Click the Play Sound button to make sure that you can hear sound in your speakers:

-
If your Logitech webcam has a buikt in microphone, verify that it is selected from the Microphone drop-down menu as shown below:

NOTE: The green bar shows your sound volume. Speak into the microphone and verify the green bar moves to test your volume.
-
Verify that your Logitech webcam is selected from the Camera drop-down menu as shown below:

If you still cannot see or hear the other person, it can be due to a variety of possible issues, including:
- Windows or third-party firewalls
- Your internet service provider (AT&T, Comcast, etc) could be blocking certain services.
- Missing Windows system components.
For assistance with these problems, visit the Video Services and Software page for a video tutorial. You can also visit the Help Page for Windows Live Messenger.
Important Notice: The Firmware Update Tool is no longer supported or maintained by Logitech. We highly recommend using Logi Options+ for your supported Logitech devices. We are here to assist you during this transition.
Important Notice: The Logitech Preference Manager is no longer supported or maintained by Logitech. We highly recommend using Logi Options+ for your supported Logitech devices. We are here to assist you during this transition.
Important Notice: The Logitech Control Center is no longer supported or maintained by Logitech. We highly recommend using Logi Options+ for your supported Logitech devices. We are here to assist you during this transition.
Important Notice: The Logitech Connection Utility is no longer supported or maintained by Logitech. We highly recommend using Logi Options+ for your supported Logitech devices. We are here to assist you during this transition.
Important Notice: The Unifying Software is no longer supported or maintained by Logitech. We highly recommend using Logi Options+ for your supported Logitech devices. We are here to assist you during this transition.
Important Notice: The SetPoint software is no longer supported or maintained by Logitech. We highly recommend using Logi Options+ for your supported Logitech devices. We are here to assist you during this transition.
Frequently Asked Questions
There are no products available for this section
