Install the software
- Download the Logitech software to customize your webcam, and fine-tune the image:
- Choose Logi Options+ for video conferencing
- Choose G HUB for game streaming
Set up your webcam
- Wipe the back of your monitor before mounting.
- Open the mount.
- Remove the film from the micro suction pad.
- Place the mount at the desired location on the monitor and press the micro suction pad to the back of the monitor.
NOTE: The micro suction pad is designed so you can place it and remove it later without leaving marks. - Retrieve the USB-C cable from the box and plug it into your webcam.
- Attach the webcam to the mount.
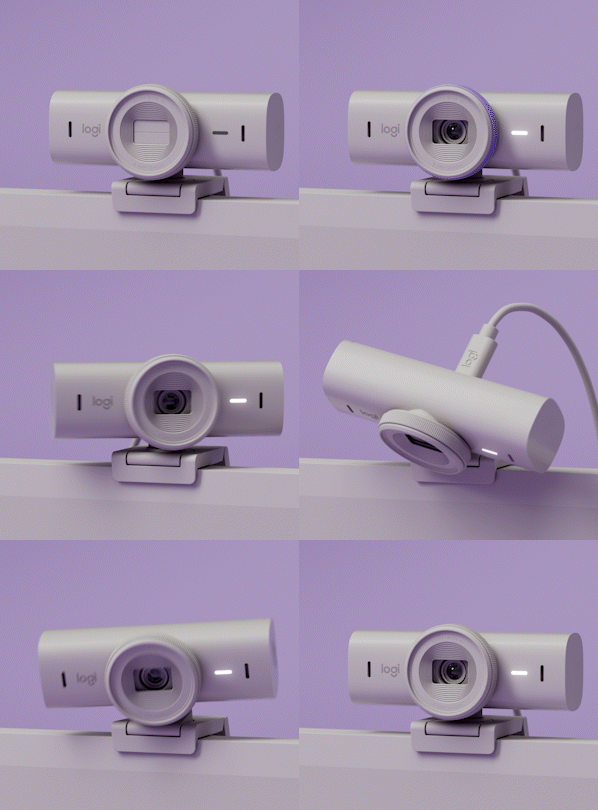
- Open the privacy shutter.
- Pan and tilt the webcam to adjust the angle to your preference.
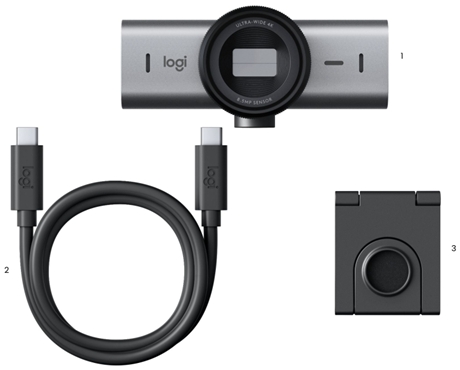
What’s in the box

1 - MX Brio Webcam
2 - USB-C cable, with USB 3.0 standard
3 - Mount clip with removable mount adaptor
Product overview

1 - Privacy shutter
2 - LED activity light
3 - Dual noise reduction microphones
4 - Detachable USB-C to C cable with USB 3.0 standard
5 - Magnetic mount including 1⁄4 thread for third-party mounts
6 - Micro-suction pad protective film (Remove before setting up mount)
Pan & Tilt

Close your privacy shutter when not in use.

Download the software to adjust, focus, and fine-tune your image.
To change settings manually:
- Crop your image: Pick your preferred field of view, zoom, and position.
-
Exposure:
- Exposure compensation allows you to modify the brightness of the image while still keeping auto exposure turned ON.
- Manual Exposure: to manually adjust the shutter speed and ISO you can turn auto exposure OFF.
-
Shutter speed impacts exposure and motion blur.
- Slower will render the image brighter but adds motion blur.
- Faster will look more crisp but darker.
- Once you’re happy with the motion blur setting, adjust your brightness with the ISO control.
- ISO: Adjusts the camera’s sensitivity to light. Higher values will be brighter but can add visual noise. Lower values will not add noise but will be darker.
- HDR: Combines multiple exposures to capture a broader range of light, enhancing contrast for dark and light areas of the image.
- Image: Adjust the color balance with temperature and tint. Adjust brightness, contrast, saturation, vibrance, and sharpness.
-
Focus: You can disable Auto Focus and manually adjust the focus of the image.

- Switch to predefined settings
- Save custom settings
- Update your firmware to get the latest version
Tips and tricks:
- Deactivate HDR when working in low light conditions for optimal image quality
Working in low light conditions with HDR ON:
Working in low light conditions with HDR OFF:
- If you use MX Brio for streaming, you can mount the webcam as needed. MX Brio can be mounted to any camera tripod using the same standard screw for an optimal viewing experience.
Important Notice: The Firmware Update Tool is no longer supported or maintained by Logitech. We highly recommend using Logi Options+ for your supported Logitech devices. We are here to assist you during this transition.
Important Notice: The Logitech Preference Manager is no longer supported or maintained by Logitech. We highly recommend using Logi Options+ for your supported Logitech devices. We are here to assist you during this transition.
Important Notice: The Logitech Control Center is no longer supported or maintained by Logitech. We highly recommend using Logi Options+ for your supported Logitech devices. We are here to assist you during this transition.
Important Notice: The Logitech Connection Utility is no longer supported or maintained by Logitech. We highly recommend using Logi Options+ for your supported Logitech devices. We are here to assist you during this transition.
Important Notice: The Unifying Software is no longer supported or maintained by Logitech. We highly recommend using Logi Options+ for your supported Logitech devices. We are here to assist you during this transition.
Important Notice: The SetPoint software is no longer supported or maintained by Logitech. We highly recommend using Logi Options+ for your supported Logitech devices. We are here to assist you during this transition.
Frequently Asked Questions
There are no products available for this section
